Cloud computing has seen a massive uptake in the recent years, with enterprises and SMBs moving a majority of their services to the cloud. From your Amazon order to your Instagram story to the article you’re reading right now is stored, processed and delivered to you – over the cloud.
In this post, we will discuss the following topics:
How to Install WordPress on Google Cloud
How to Install WordPress on AWS
What is Cloud Computing?
Cloud computing is the on-demand delivery of computing services. These computing services are delivered over the internet and usually with pay-as-you-go pricing. The services include IT resources such as computing power, databases, storage, and software.
For more on cloud computing see – Types of Cloud Computing — an Extensive Guide on Cloud Solutions and Technologies
Now, what is WordPress?
In simple, WordPress is a website operating system. It is used to create any sort of website or blog. WordPress is probably one of, if not the most user-friendly blogging and website content management systems (CMS) around. WordPress can be seen as the engine of your website, it allows you to run, create, edit your website as well as make sure it displays correctly.

“35% of the web is built on WordPress. More bloggers, small businesses, and Fortune 500 companies use WordPress than all other options combined” – WordPress.com
Just to emphasize on the picture above, the second-largest platform, namely, Joomla, is used by less than 3% of websites.
Why is WordPress so popular? Well, listed below is some of the reasons:
- WordPress is free and easy to download.
- It is open-source, meaning it is accessible to anyone. Anyone can see, modify, and distribute projects built upon WordPress as well as help grow the platform.
- WordPress is versatile, you can run and create any type of website, whether it is big, small, or extremely complex. The same goes with blogging.
- It is modern, meaning all standard website software is easy to use and find on WordPress.
- WordPress is user-friendly. It is accessible and ideal for beginners.
- It is accessible through any device. Your website can be accessed via desktop, laptop, tablet, or phone.
- WordPress is extensible. Plugins allow you to add custom features to WordPress.
One confusing thing with regards to WordPress is when googling “WordPress” two different results are found:
- WordPress.com
- WordPress.org
Now, what is the difference?
The key difference between the two are the hosts, with WordPress.org, you host your own site. With WordPress.com, they host your website for you. Although WordPress.com is easier to set up it does not allow the freedom of WordPress.org. We would recommend using WordPress.org.
As discussed in the blog, Types of Cloud Computing — an Extensive Guide on Cloud Solutions and Technologies, the three leading cloud providers are Google Cloud, AWS, and Microsoft Azure. The best WordPress hosting providers use one of these providers to offer their services, for instance, The Website Engineer is a WordPress hosting provider that makes use of AWS for hosting purposes.
How to Install WordPress on Google Cloud, AWS, and Microsoft Azure
Below follow’s a guide on how to Install WordPress on the three leading platforms:
How to Install WordPress on Google Cloud
Installing WordPress on Google Cloud can be done in three steps:
1.) Deploy a WordPress instance
The first thing you will have to do is sign up for Google Cloud. Setting up an account is easy and will only take a few minutes of your time. After setting up the account we would recommend you verify the account using your bank.
R4500 of promotional credits are offered to you if you verify your account and Google Cloud also offers a free trial.
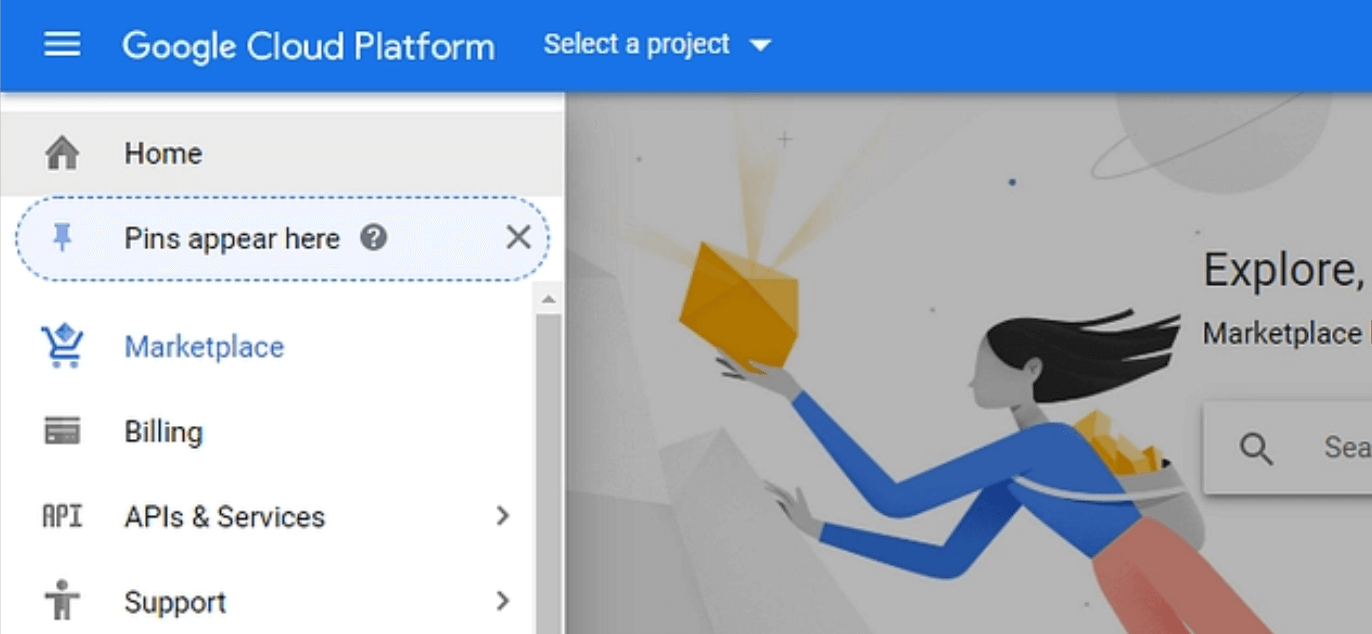
After you made the decision for making use of the free trial or not, you should create a new project. This is done on your dashboard by accessing the menu and selecting the Marketplace option:
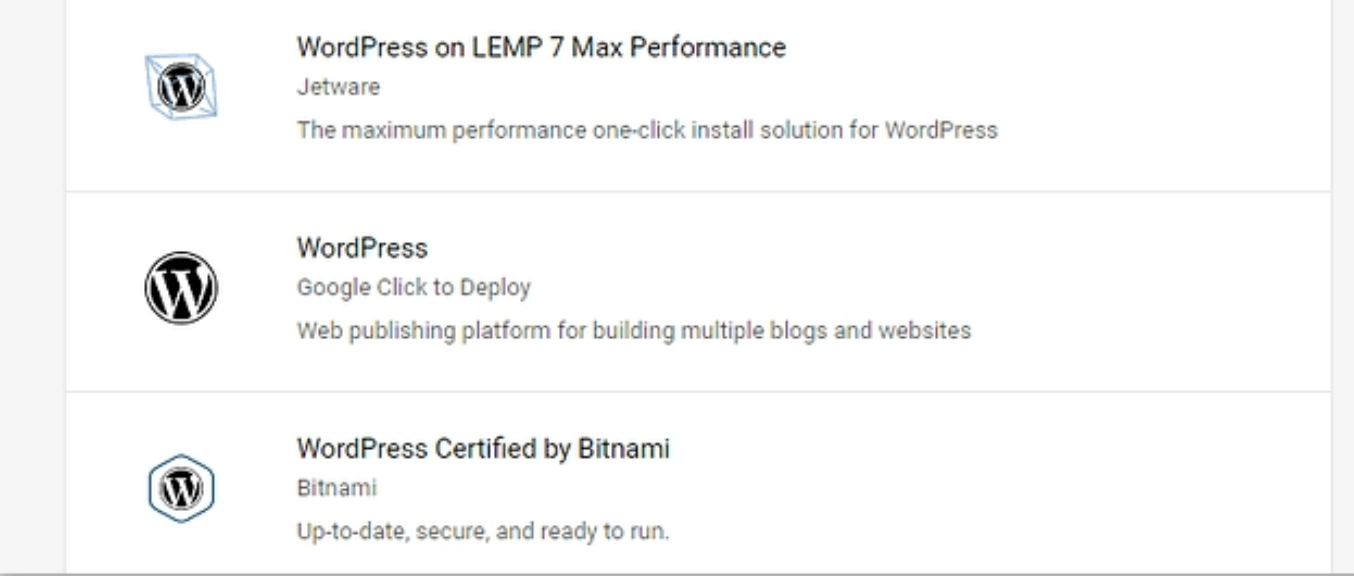
A new page will appear where you should use the search feature and look for WordPress. After searching WordPress, a list of WordPress configurations, you can deploy should show up. Scroll down and look for the WordPress option with Google Click to Deploy and select this option.
After selecting this option, a screen displaying the estimated costs and what stack the package uses will show. The stack includes 1 CPU, 2 GB of RAM, and 10 GB of storage for approximately R205 per month. This will easily run a website that receives a moderate amount of traffic.
If this option is right for you, click on LAUNCH ON COMPUTE ENGINE to proceed with your setup.
2.) Create and configure your new project:
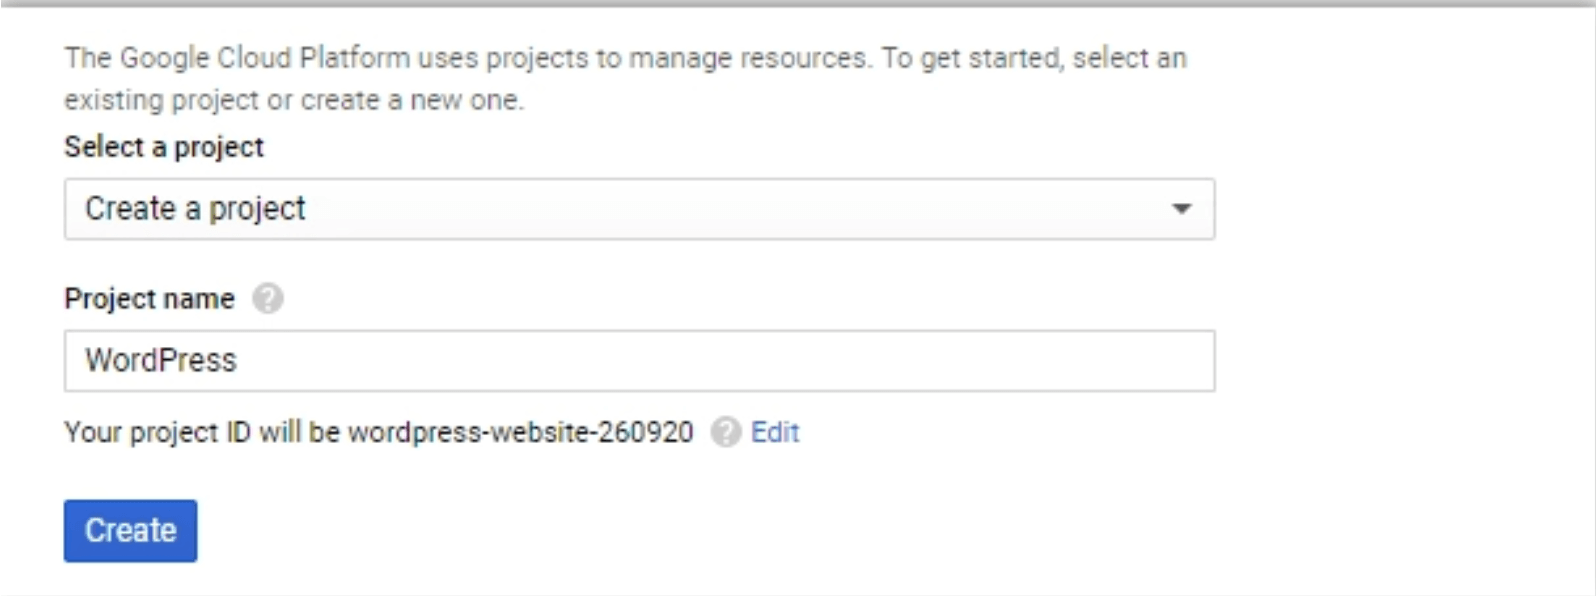
After clicking on LAUNCH ON COMPUTE ENGINE, Google Cloud will ask you to select a project and give your project a name, and then click Create.
Once you created the project, the server will take a few minutes to set everything up. While the server is busy you can change the configuration for your new Google Cloud instance. This will allow you to change the settings to meet your specific requirements and will either reduce or increase the associated cost.
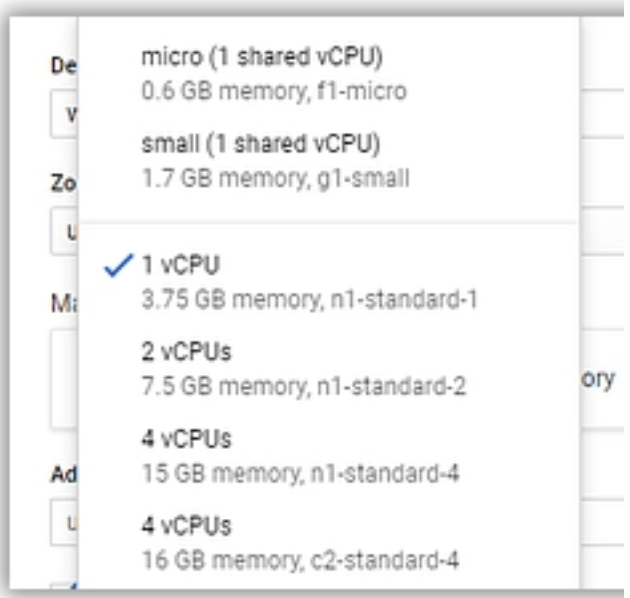
We recommend not using less than 2 GB of RAM. The default setup uses a shared CPU and if you are anxious about the performance you can change the setting at Machine type and choose 1vCPU. This includes 3.75 GB of memory.
To improve your performance, even more, we recommend changing the Boot disk type from Standard Persistent Disk to SSD Persistent Disk.
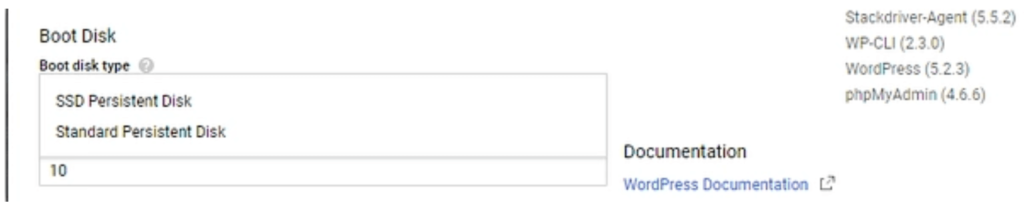
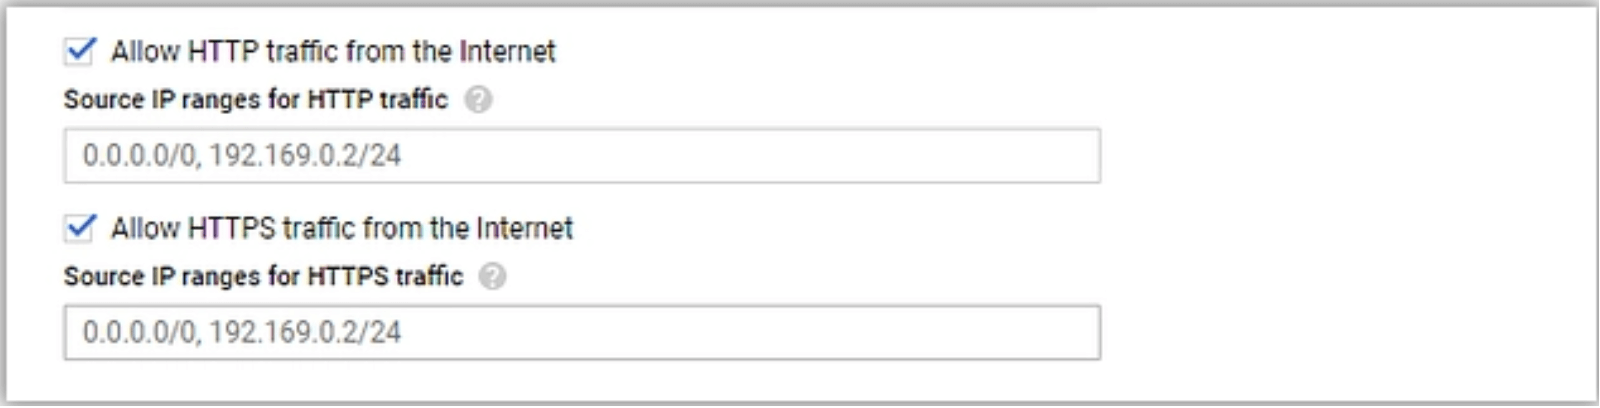
Before proceeding to the next step make sure to choose a region for your server, tick the Install phpMyAdmin option, and enable both HTTP and HTTPS traffic.
When you have done all the above and you are happy, click the Deploy button, this may take a few minutes. After this is done, you can access your new installation credentials from the deployment page. We recommend you change your MySQL and WordPress admin users and passwords.
3.) Map a domain and set up an SSL certificate:
At this stage, your website is up and running but is only accessible through an IP address. To change this, you will have to map a custom domain to it. You can purchase a domain from any domain registrar if you do not have one already.
Finally, you need to set up an SSL certificate for your website. Although this last step is only needed if you enabled HTTPS, which we do recommend. Your website is now active and ready for the public.
How to Install WordPress on AWS
The first thing you will need to do is sign up for AWS and verify your account using a credit card that will cost you R15. After verifying your account via SMS, you can select the Free support plan.
Below follow three steps to install WordPress on AWS:
1.) Launch and configure a WordPress instance:
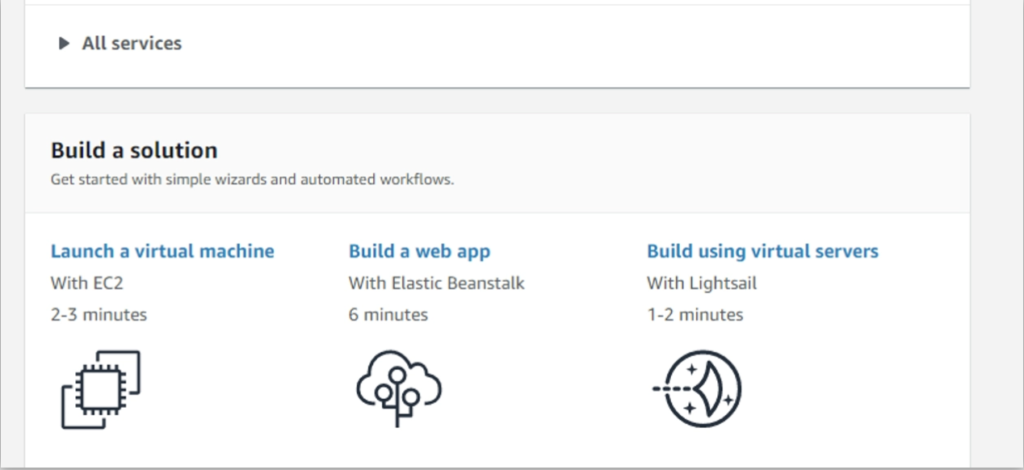
The first step is to set up an AWS EC2 instance. These are simple virtual servers. To launch an instance, select the Launch a virtual machine option on the main screen under Build a solution.
The type of instance needs to be selected next. On the menu, select the AWS Marketplace option. Here you will find multiple pre-built machine configurations to choose from.
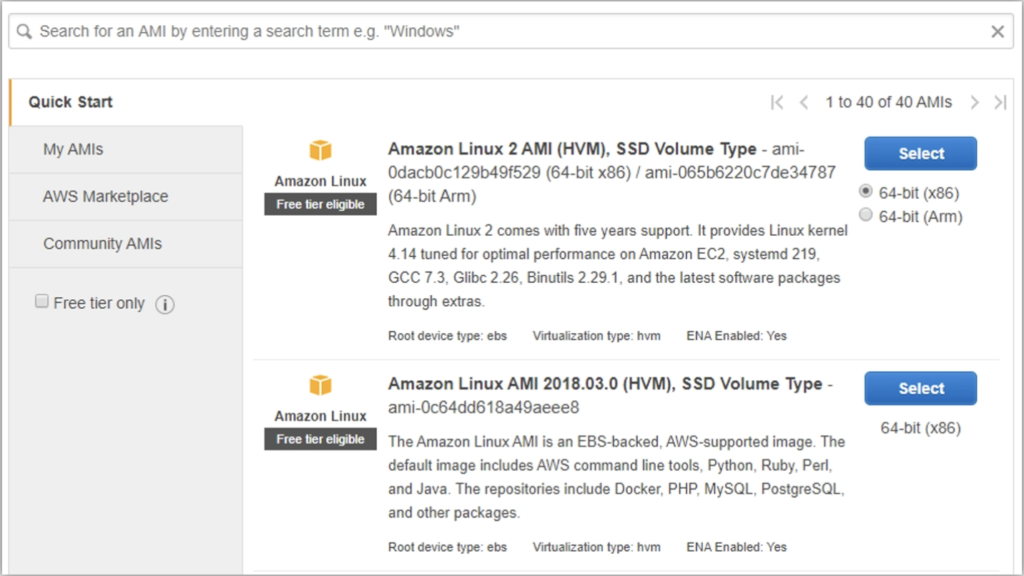
Use the search feature and search for “WordPress”. From the list select the WordPress Certified by Bitnami and Automattic option.
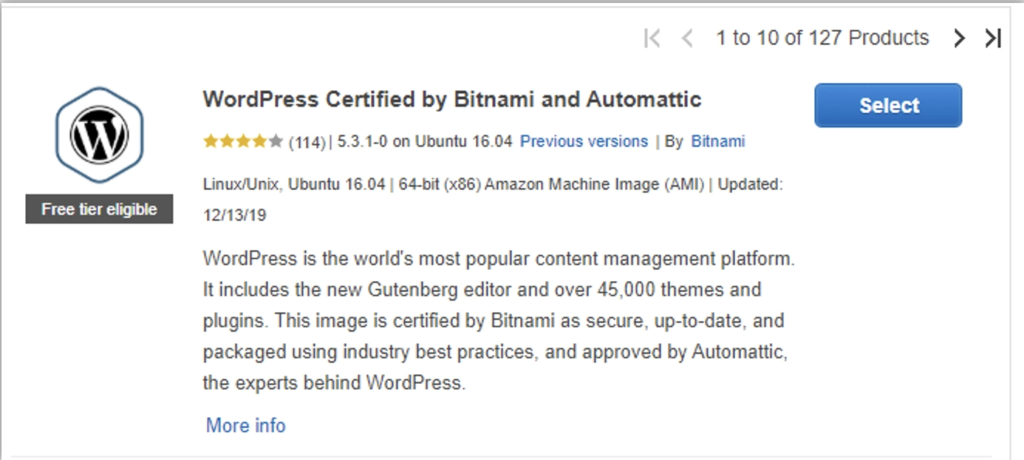
After you selected the option, the details of the configuration, as well as the fees, are shown. If you click continue, you will be able to choose which kind of instance you want to use to install WordPress.
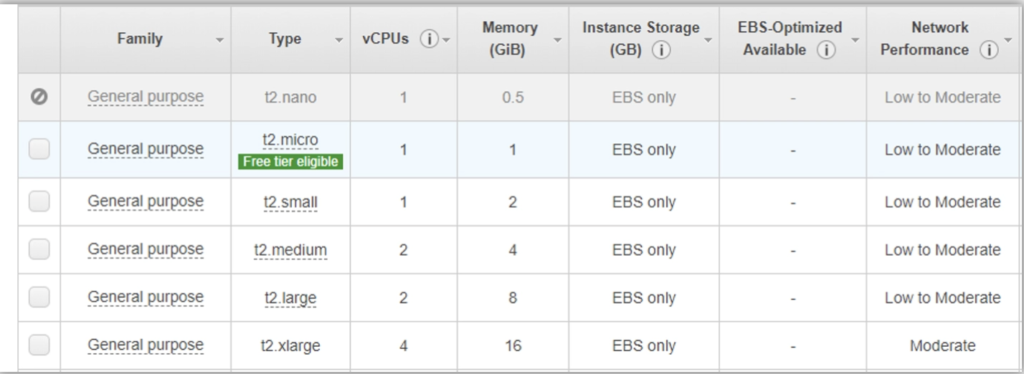
We recommend not using less than 2 GB of RAM. Budget wise the t2.small setup is a good option, otherwise, we recommend using the t2.medium. This setup includes 2 CPUs and 4 GB of RAM.
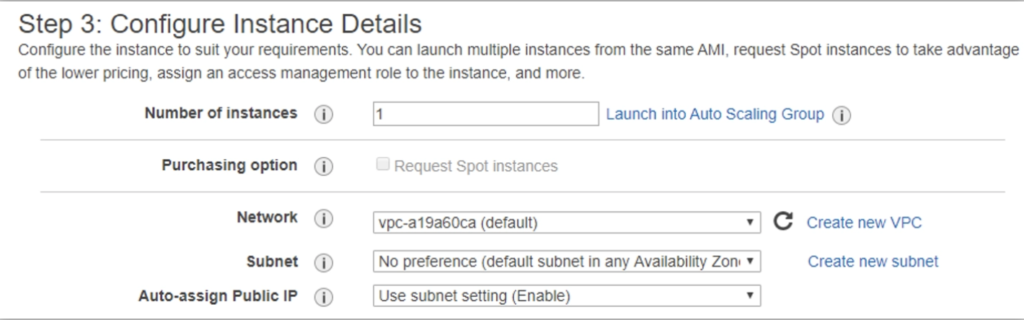
After selecting an instance that will meet your specific requirements, you can review the configuration. If you are a beginner and this is your first time working with virtual private servers (VPS), we recommend not changing the default settings. This will ensure WordPress runs without any problems.
Click on Next to select the amount of storage you want. AWS will charge you for any additional storage. 10 GB of storage is included by default.
Next, you will be able to review your configuration and finally click Launch. AWS will allow you to create a ‘key pair’ you can use to SSH into your server.
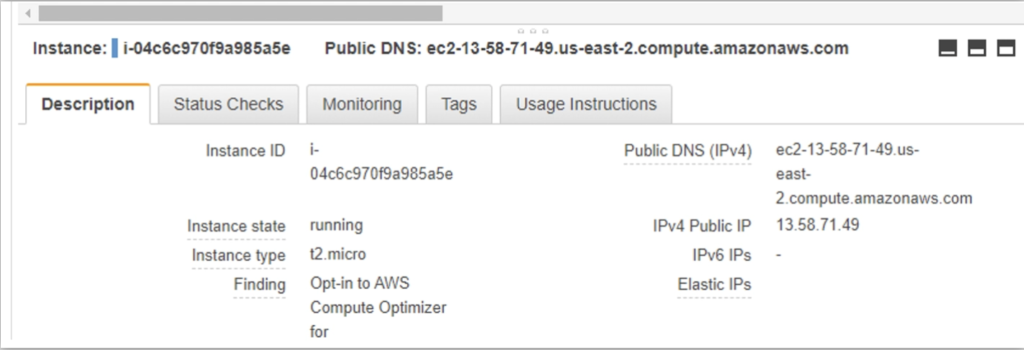
2.) Access your WordPress instance and find its public IP.
By going back to the AWS home screen, you can now access your new instance. To do this, click on the Service tab at the top and select the EC2 option.
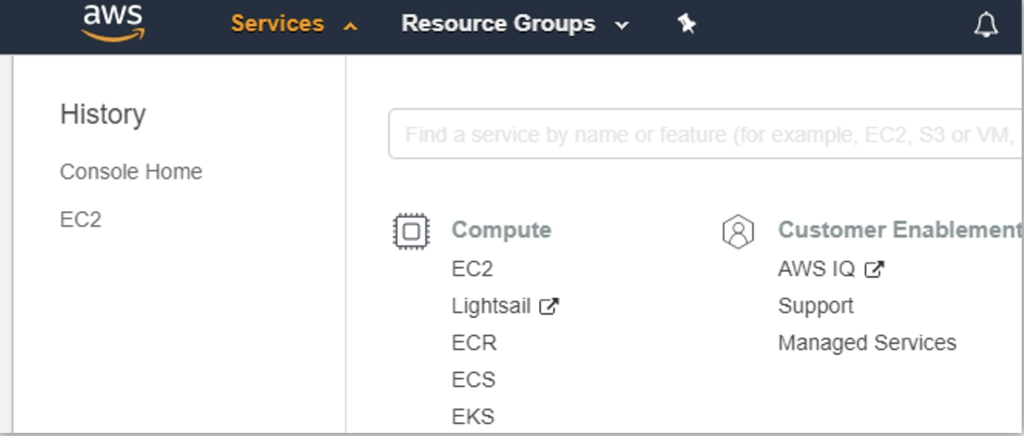
After clicking on the EC2, look for the Running Instances option under the main menu:
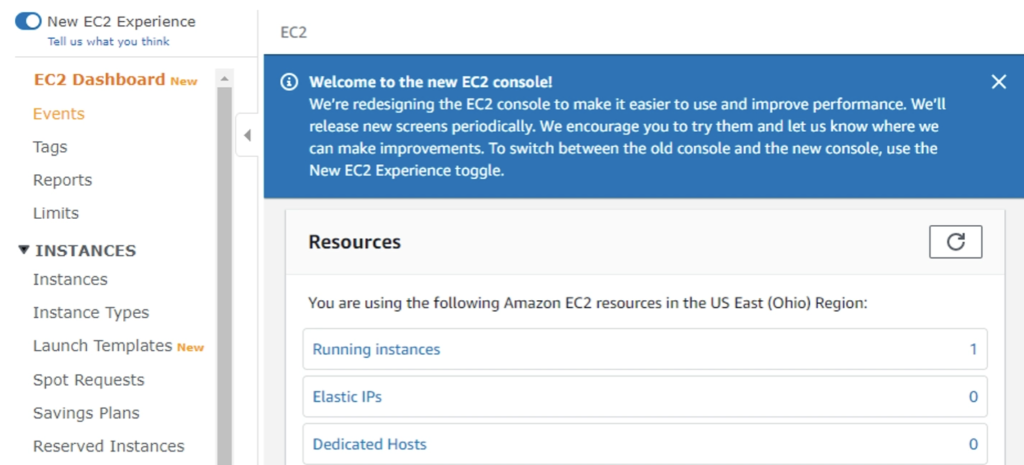
You can now select your running instance and view its public IP. If you copy this IP address and paste it into your browser, you will see your new WordPress website!
3.) Point your domain towards your AWS instance:
You now want to map a domain to your IP address, so everyone else can easily access it. This final step will depend on the domain name registrar you use. You can use any of the domains you own and map it towards your IP address.
Select the record type as “A Record” and set the Host option to www. Now you can enter your IP address under the IP Address field and set the TTL option to Automatic. Remember to save the changes and after a few hours, you will be able to access your website through the domain name. You can also now configure your settings and choose your theme to suit your taste!
How to Install WordPress on Microsoft Azure
The steps to Install WordPress on Microsoft Azure are discussed below:
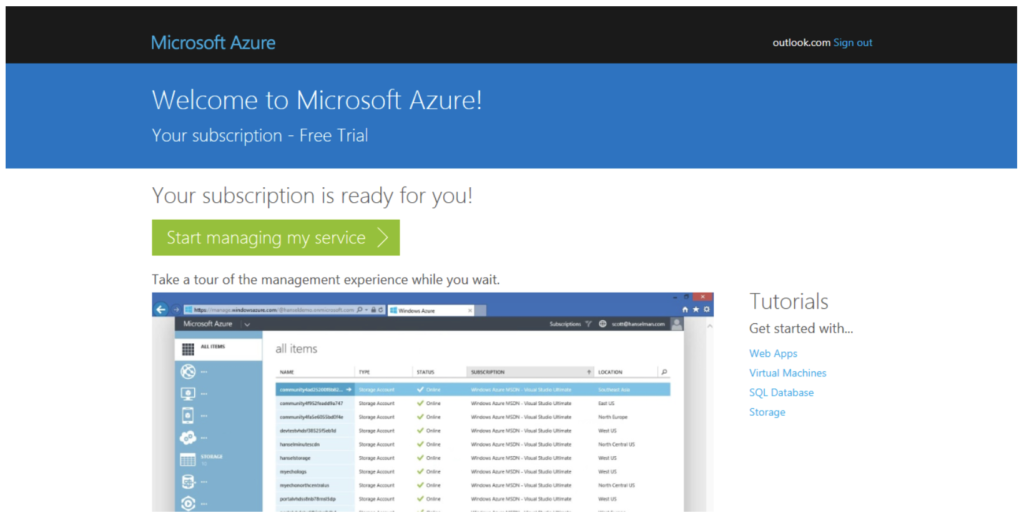
1.) Register a Microsoft Azure Account:
Microsoft Azure offers a free trial account valid for 30 days. With this trial account, you get R3000 worth of cloud computing resources. You will need a valid credit or debit card for this to work.
2.) Install WordPress Web-App
After registering for a Microsoft Azure account, proceed to the Azure Management Dashboard and log in:
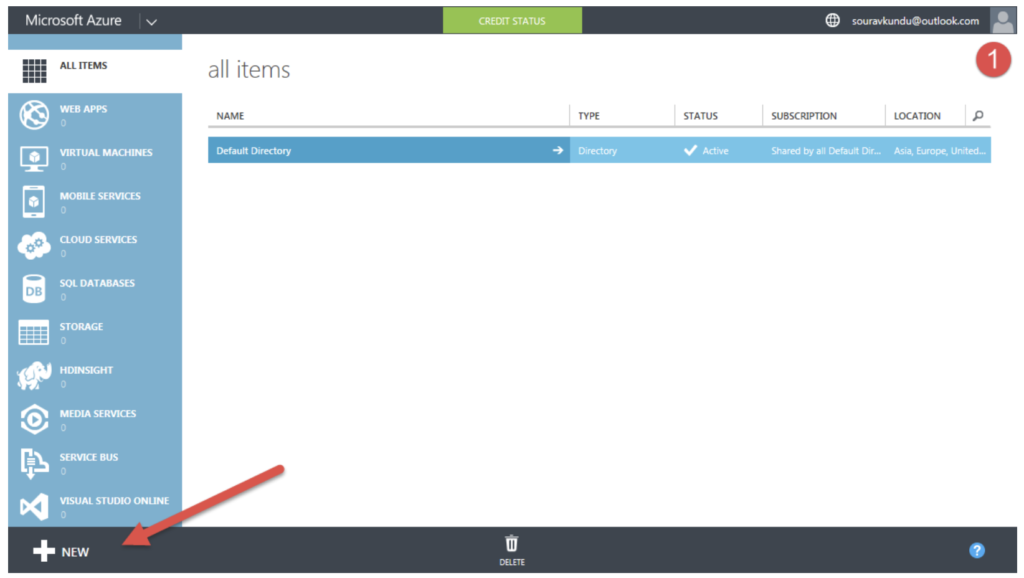
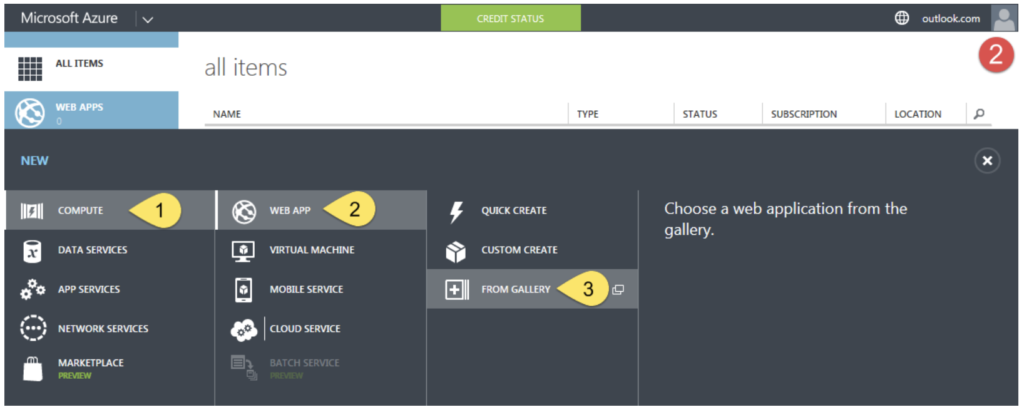
Next click NEW at the bottom of your screen. Then select COMPUTE -> WEB APP – > FROM GALLERY. Wait for the new window to open.
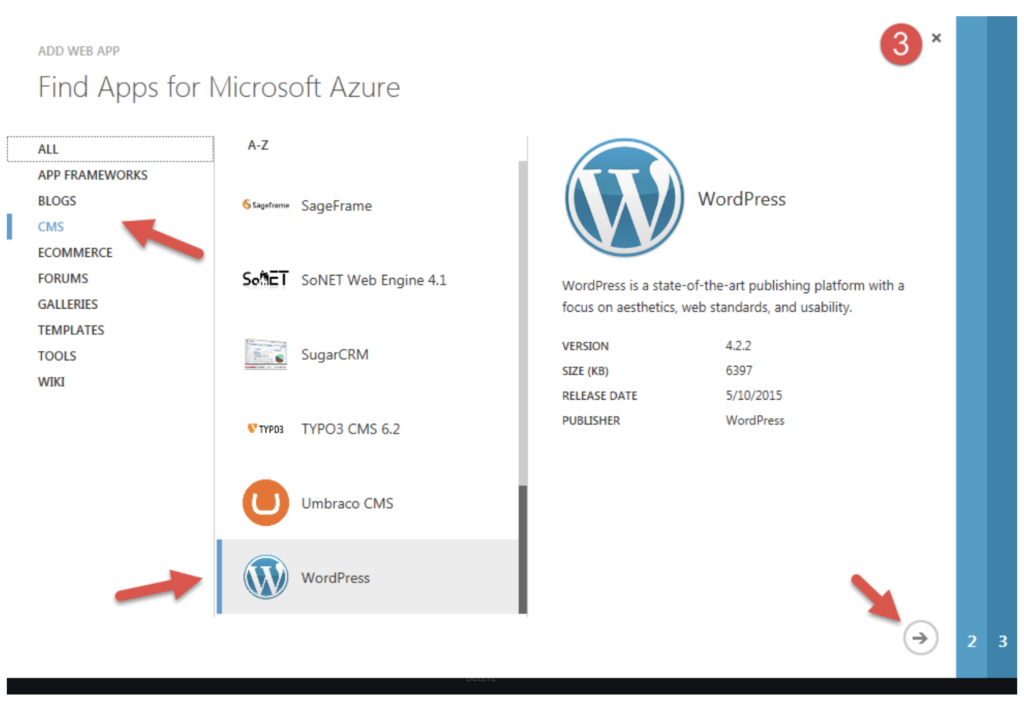
In the new window, on the left, select CMS. Then scroll down and select WordPress and click on the arrow in the right bottom corner.
You will need to configure your App now. All you have to do is enter the name of your site under Site Settings. Leave the rest of the settings as is. To proceed click on the arrow on the bottom right of the screen.

Next, you will need to give WordPress a database to store the content. Give a name for the database and tick the legal terms statement and then click on the tick button on the bottom left. Microsoft Azure will now start creating the web-app for you.

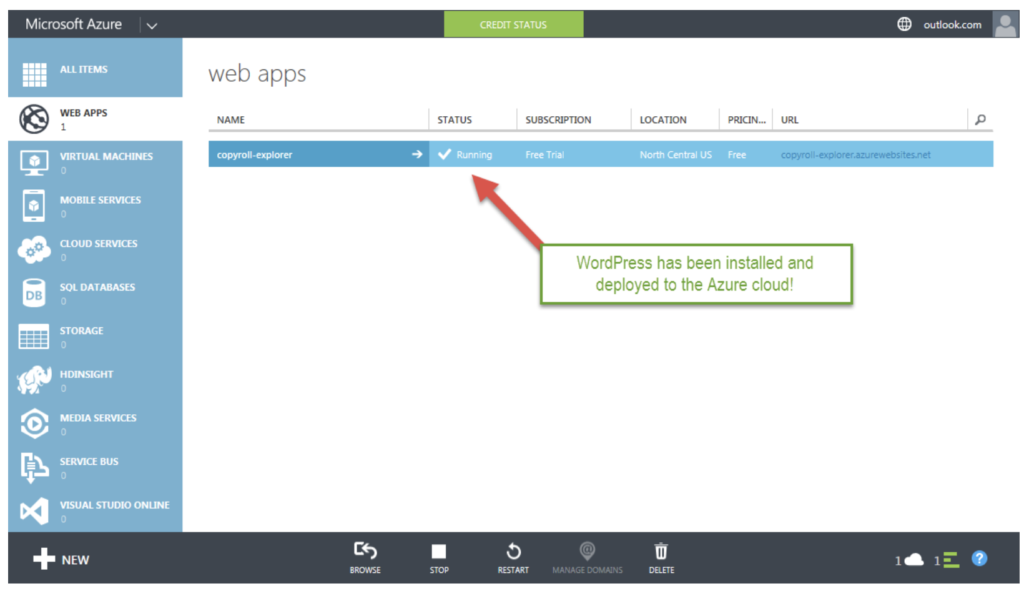
You will now find a new entry under web-apps. You can now click on the URL to launch your WordPress site. Azure will also give you a free subdomain for your hosted apps.
You can now do the final install. Choose your preferred language and click continue, then fill in the information in the next window. They will ask for your Site Title and a Username as well as a password. And there you have it; WordPress has been installed and you can now login with your details.
Conclusion
You can now do the final install. Choose your preferred language and click continue, then fill in the information in the next window. They will ask for your Site Title and a Username as well as a password. And there you have it; WordPress has been installed and you can now login with your details.
At Web.Eng, we use Amazon Web Services, one of the leading cloud providers to offer our services. Web.Eng offers managed cloud hosting for WordPress, with unique plans to suit your needs. Moving your site is easy, especially when using our free automatic migration tool that makes switching your site to Web.Eng a breeze.
If you’re interested in letting Web.Eng handle your cloud hosting requirements, drop us a line and we’ll be happy to assist you further!


